File And Folder Sharing
This document explains how to share files and folders with other users in FileAgo, enabling collaboration and access control.
Sharing Files and Folders
To share a file or folder with other users:
- Navigate to the file or folder you want to share
- Click the hamburger menu icon (three horizontal lines) next to the item
- Click on the “Sharing” tab
Sharing Options
FileAgo provides several sharing options to control how others can access your files and folders:
Internal Access
An Internal access share is created when a file or folder has to be shared with users (or groups) within your organization.
Creating Internal Access Shares
To create a new internal access share:
- Navigate to the file or folder you want to share
- Click the hamburger menu icon (three horizontal lines) next to the item
- Select the “Sharing” tab
- In the “Internal access” section, click the “+” button
- Configure the sharing options:
- Select users or groups to share with
- Set permission levels:
- Read only: Users can view files and folders but cannot modify or delete content
- Read and write: Users can view files and upload/modify content but cannot delete
- Read, write and delete: Users have full access to view, upload, modify, and delete files and folders
- Enable or disable download permissions with the “Allow downloading of files” checkbox
- Set an expiration date/time for the share
- Click “Create Internal Access” to finalize the share
Example configuration (below screenshot):
- Resource being shared: “Test Folder”
- Users selected: “Narendra K V N”
- Groups selected: “Development Team”
- Permissions set to “Read only”
- Download permission enabled
- Expiration date/time not configured (share will not expire)
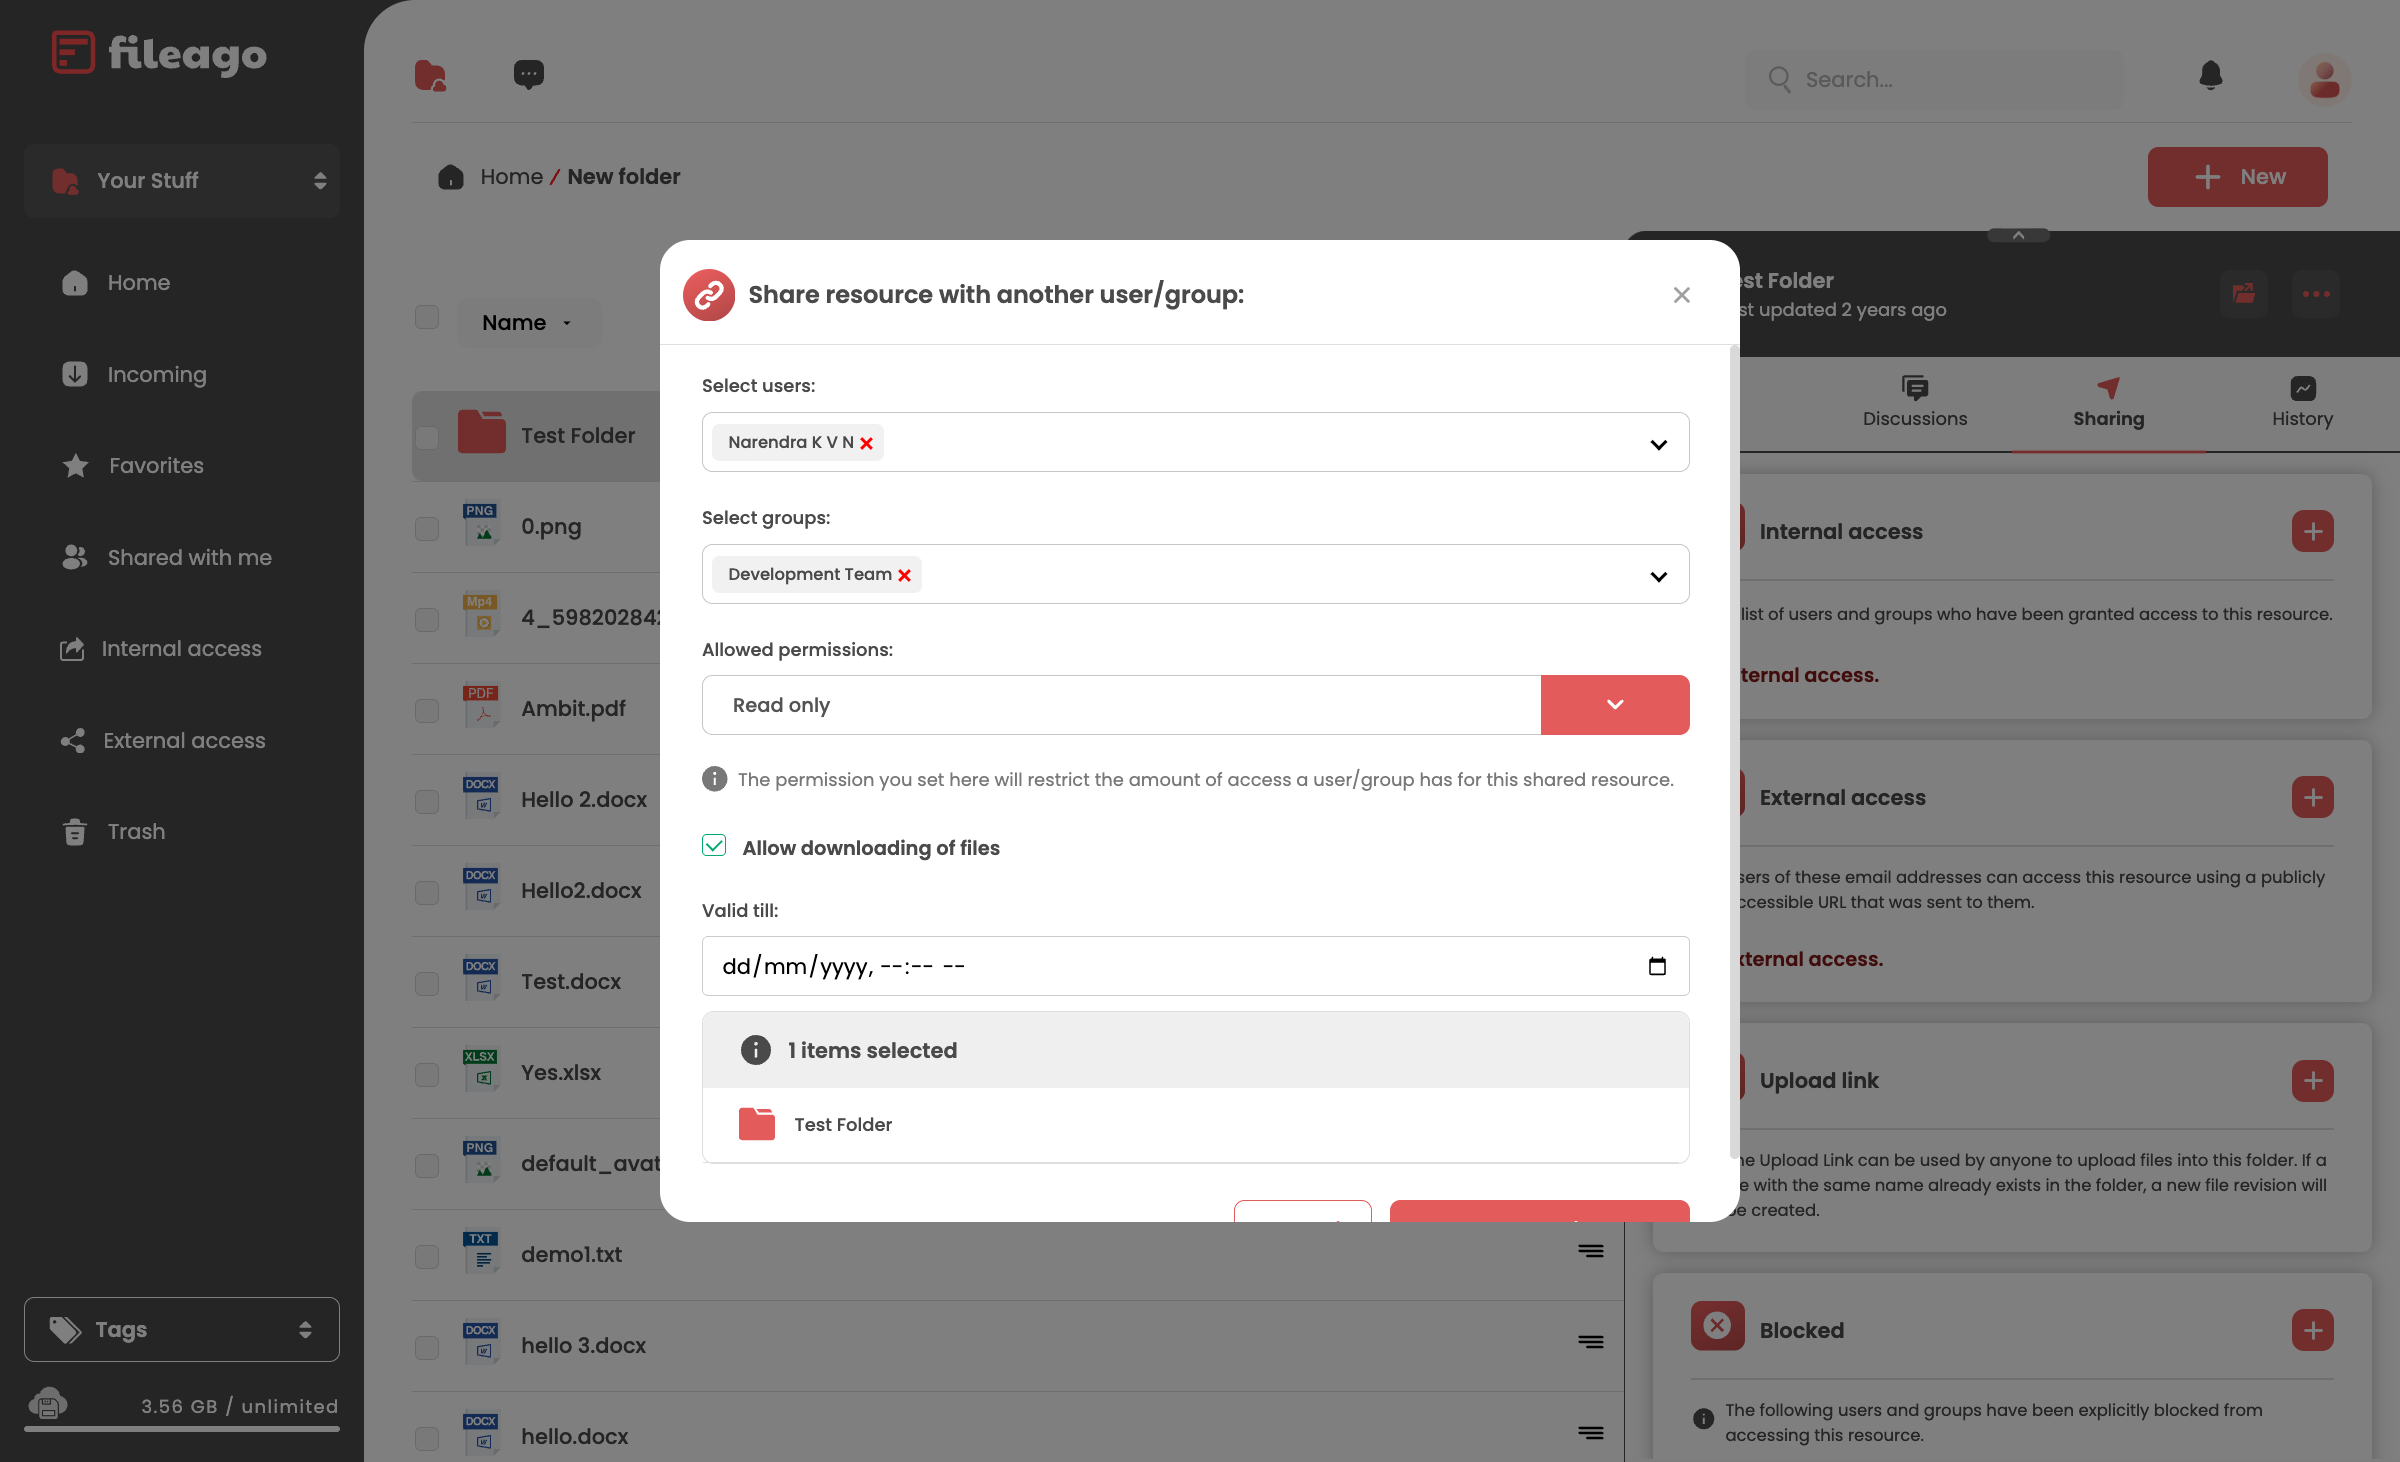
Internal Access Sharing Dialog - Example showing a folder being shared with a user and group
Managing Internal Access
Users with access to a resource will see it in their “Shared with me” section in the left navigation panel. Resource owners can manage internal access by:
- Navigating to the shared file or folder
- Clicking the hamburger menu icon
- Selecting the “Sharing” tab
- Modifying or revoking access for specific users or groups
External Access
External Access is created when you wish to share a file or folder with users outside of your organization or through public URLs.
Creating External Access Shares
To create a new external access share:
- Navigate to the file or folder you want to share
- Click the hamburger menu icon (three horizontal lines) next to the item
- Select the “Sharing” tab
- In the “External access” section, click the “+” button
- Configure the sharing options:
- Enter email addresses of external users
- Enable or disable download permissions
- Enable email OTP verification
- Force the share to expire immediately upon access (One time view)
- Change share password on file download (One time download)
- Set an expiration date/time for the share
- Add a personal message (optional)
- Click “Send” to email the sharing invitation
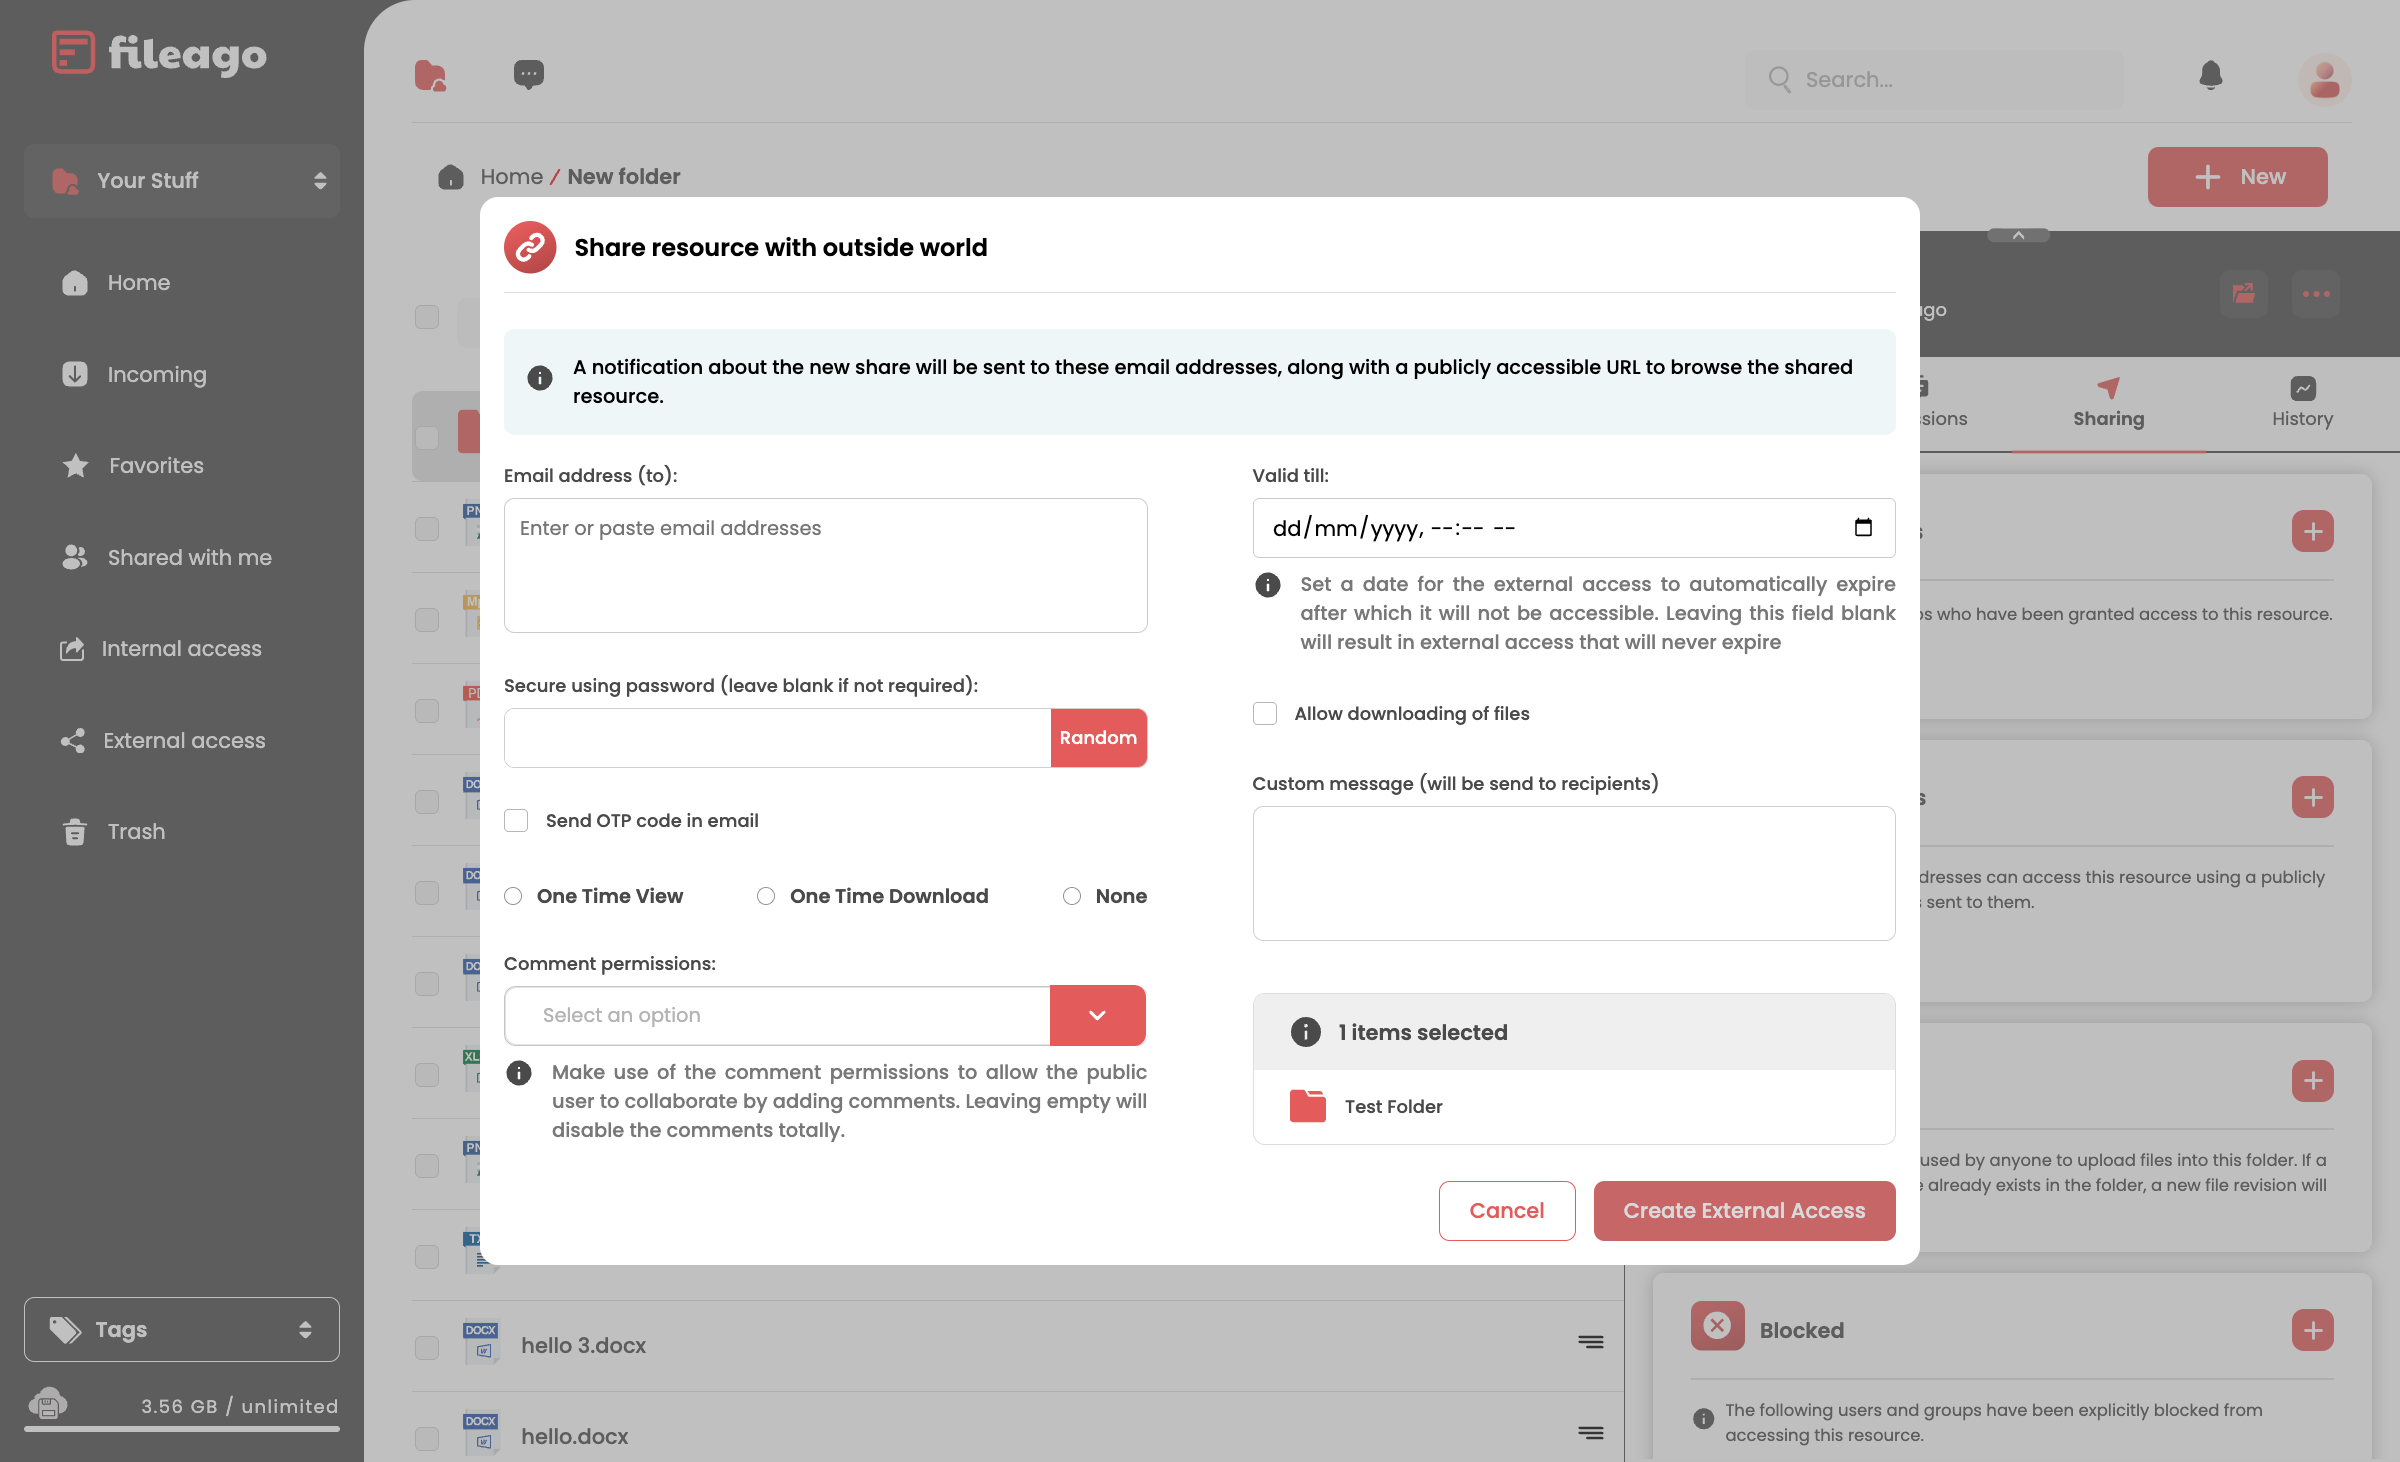
External Access Sharing Dialog - Example showing options for sharing with external users
Managing External Access
External users will receive an email with a link to access the shared content. They can access the content without creating a FileAgo account, though some features may be limited (only read and download are permitted). Resource owners can manage external access by:
- Navigating to the shared file or folder
- Clicking the hamburger menu icon
- Selecting the “Sharing” tab
- Viewing the list of external shares
- Modifying or revoking access as needed
Upload Links
FileAgo also provides Upload Links, which allow anyone to upload files directly to a folder without accessing the folder contents. This feature is useful for collecting files from multiple sources without granting full access to the folder.
For detailed information about creating and managing upload links, please see the Upload Links documentation.
Blocked Users and Groups
FileAgo also allows you to explicitly block users or groups from accessing specific resources. This feature provides an additional layer of access control, ensuring that even if a user or group has been granted access to parent folder, they will be prevented from accessing the resource.
How Blocking Works
Blocking is a powerful feature that overrides any existing access permissions. When you block a user or group:
- They will immediately lose access to the resource, regardless of any previously granted permissions
- They will not be able to access the resource through any means
- They will not receive any notifications about the resource
Adding Users or Groups to Block List
To block users or groups from accessing a resource:
- Navigate to the file or folder you want to protect
- Click the hamburger menu icon (three horizontal lines) next to the item
- Select the “Sharing” tab
- In the “Blocked” section, click the “+” button
- Select the users or groups you want to block from accessing this resource
- Click “Block” to confirm
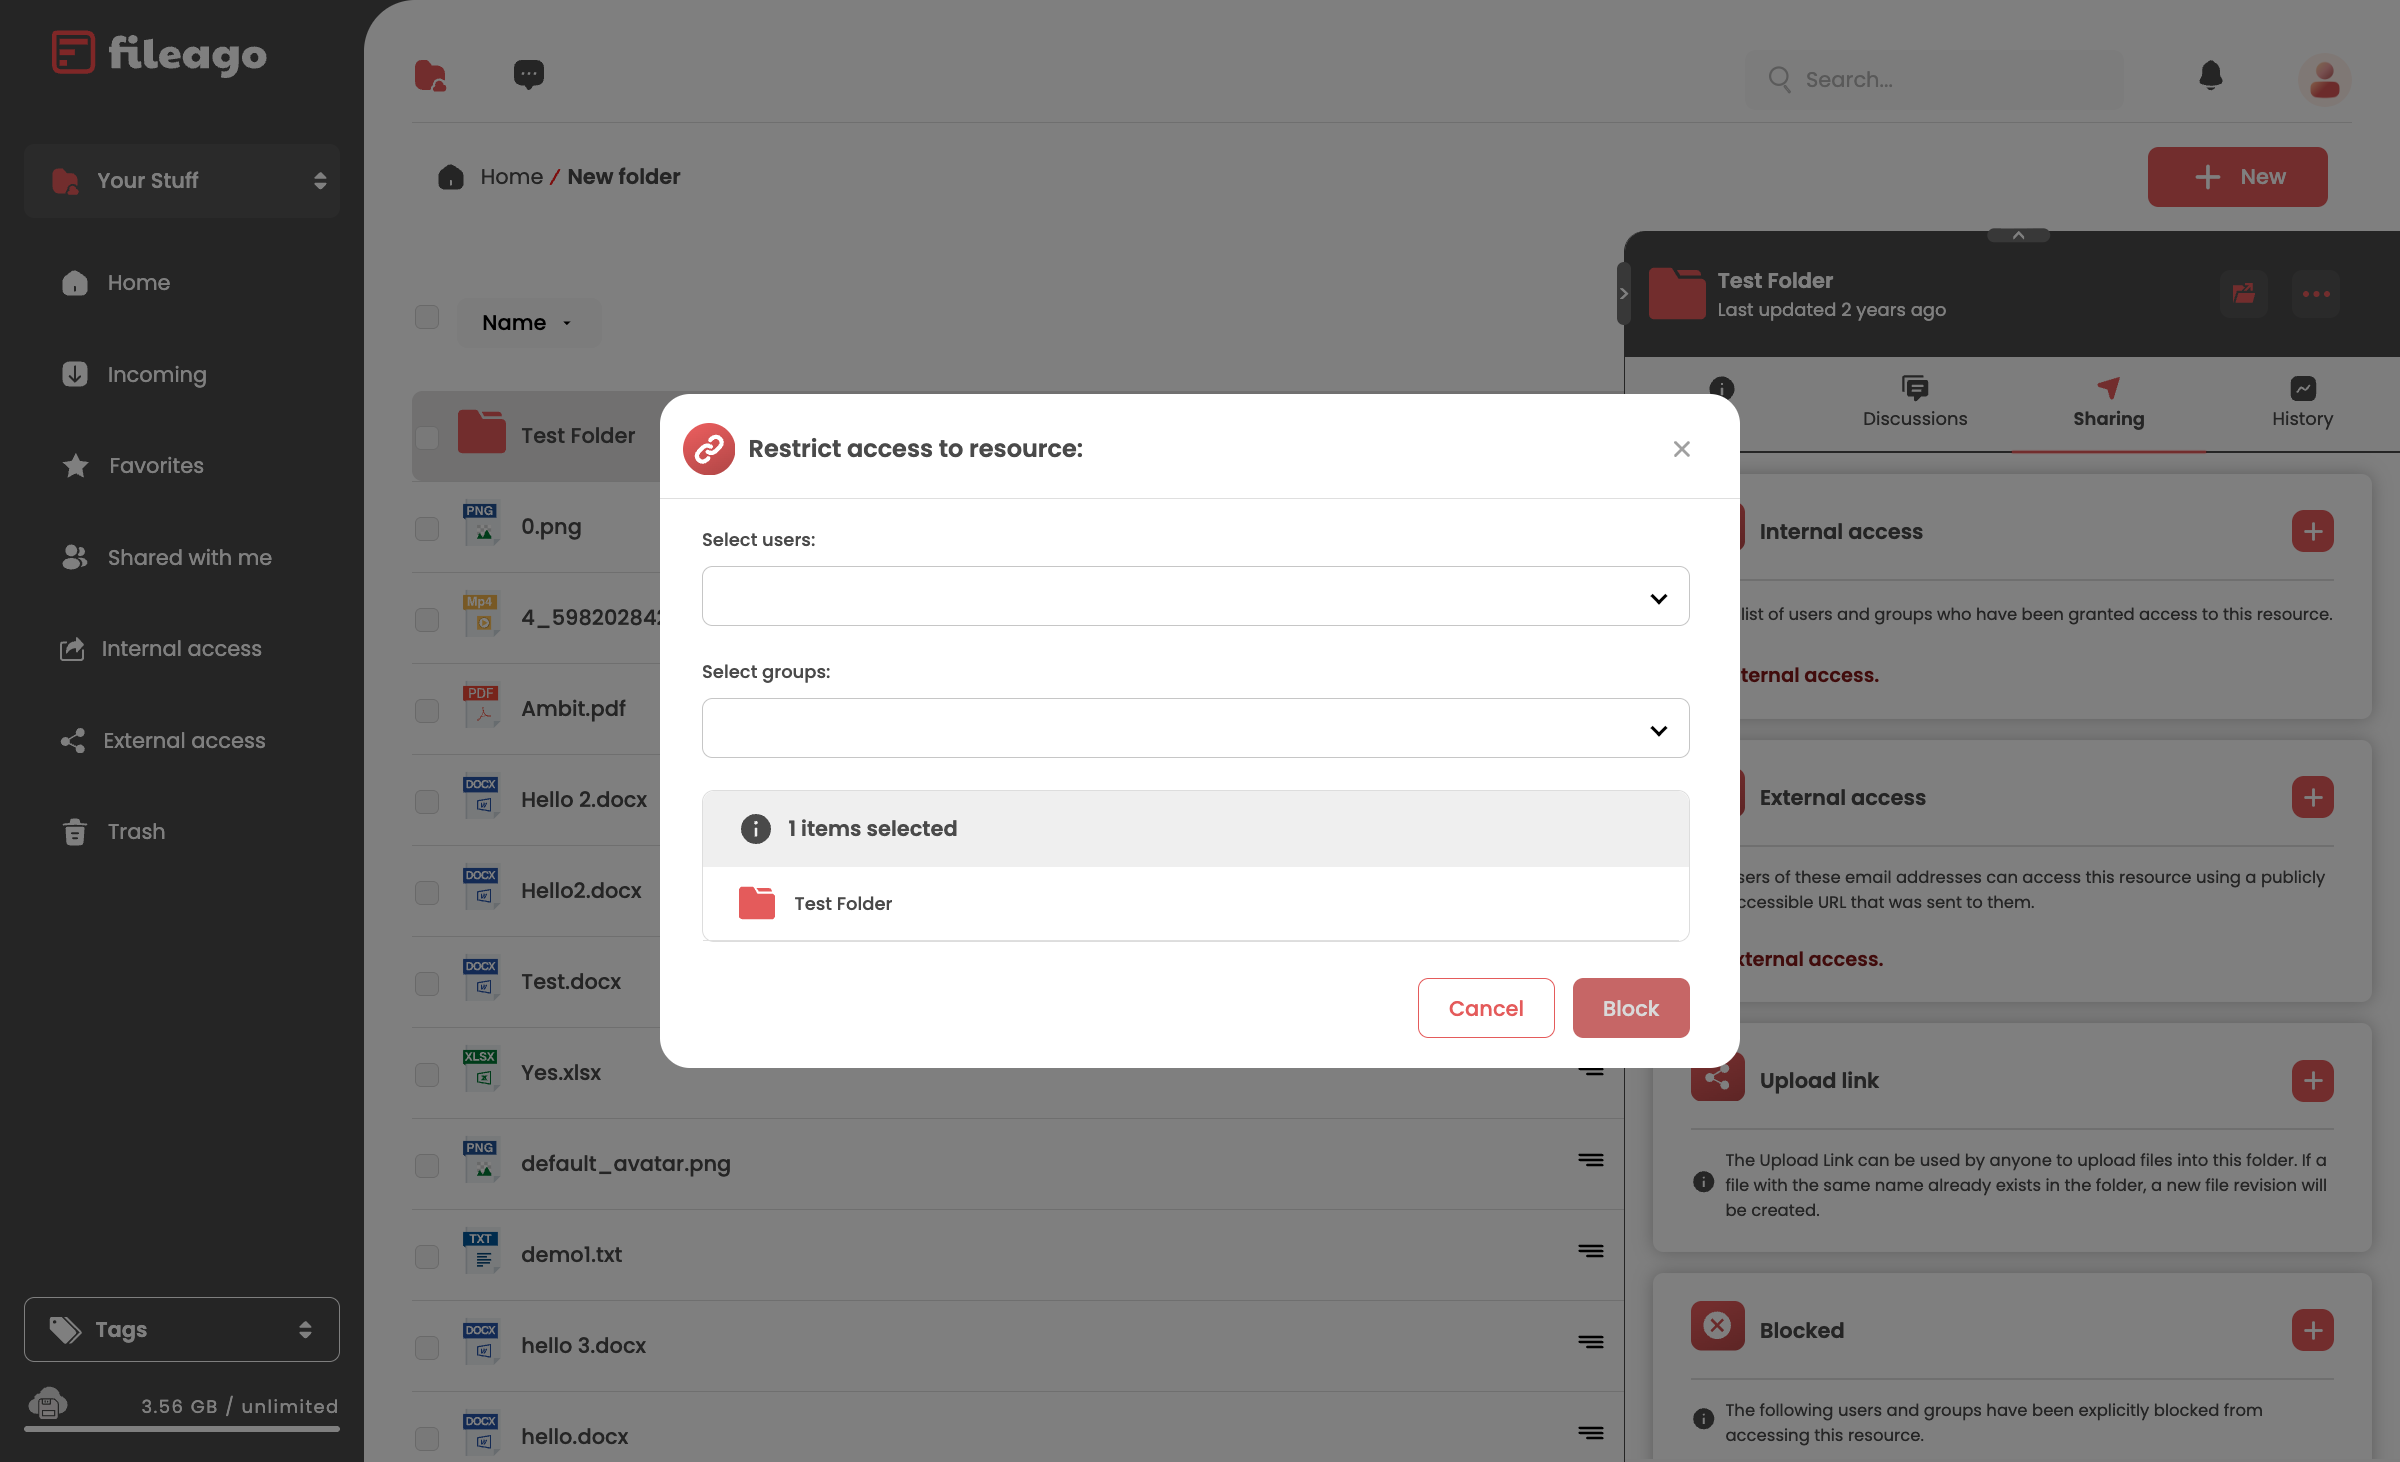
Blocked Section Expanded - Example showing how to block users or groups
Managing Blocked Users and Groups
As the resource owner, you can manage your block list at any time:
- Navigate to the file or folder with blocked users
- Click the hamburger menu icon
- Select the “Sharing” tab
- In the “Blocked” section, you can:
- View the list of currently blocked users and groups
- Remove users or groups from the block list by clicking the “X” button next to their name
- Add additional users or groups to the block list
Important Considerations
- Blocking is immediate and takes precedence over all other access permissions
- Blocked users will not be notified that they have been blocked
- Blocking a group will block all members of that group
- You cannot block yourself from accessing your own resources
Managing Shared Content
Viewing Shared Content
To see resources shared with you internally:
- Click “Shared with me” in the sidebar navigation
- This view shows all files and folders shared with you by other users
To see what you’ve shared:
- Click “Internal access” in the sidebar navigation
- This view shows all files and folders which has been shared with other users within your organization
To see resources shared with you externally:
- Click “External access” in the sidebar navigation
- This view shows all files and folders shared with outside users via public links
Managing Access
To modify or revoke access to shared content:
- Navigate to the shared file or folder
- Click the hamburger menu icon
- Select the “Sharing” tab
- You can:
- Change permission levels for existing users
- Remove access for specific users
- Disable external sharing links
Collaboration Features
Comments and Discussions
FileAgo includes collaboration features to facilitate communication around shared content:
- Navigate to a shared file or folder
- Click the hamburger menu icon
- Select the “Discussions” tab
- Add comments and engage in discussions about the content
Notifications
FileAgo sends notifications for sharing activities:
- When someone shares content with you
- When someone comments on shared content
You can customize notification settings in your user profile.
Best Practices for Sharing
- Use appropriate permission levels: Only grant the minimum permissions necessary
- Set expiration dates: For temporary sharing needs, always set expiration dates
- Use password protection: For sensitive content, enable password protection
- Regularly review sharing: Periodically check what you’ve shared and with whom
- Use groups: For sharing with multiple users who have the same access needs, create groups
- Use blocking strategically: Block users or groups when you need to ensure they cannot access sensitive resources
Troubleshooting Sharing Issues
If you encounter issues with sharing:
- Check permissions: Ensure you have the right to share the content
- Verify user accounts: Make sure the users you’re sharing with have valid accounts
- Review organization policies: Some organizations restrict external sharing
- Check storage limits: Ensure sufficient storage for shared content
If problems persist, contact your system administrator or FileAgo support.